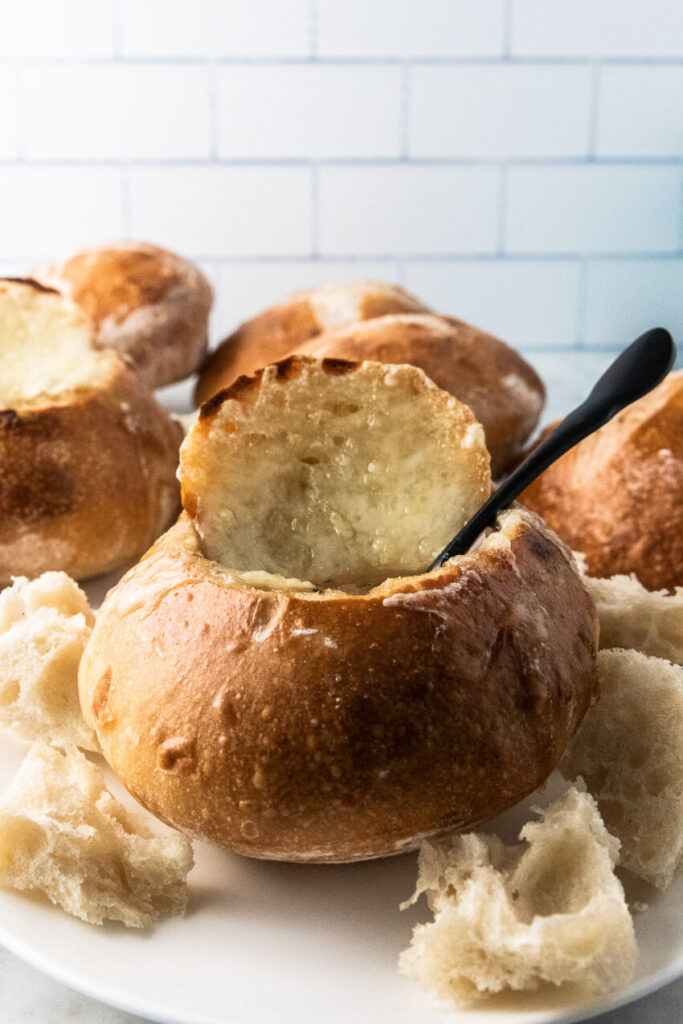
These homemade sourdough bread bowls are mini loaves of sourdough made to hold soups, stews, and chowders. Remove the centers of the crusty boules and create a delicious bowl. These can be made in about 8 hours or left for a longer overnight ferment, so they can fit into any schedule!
As an Amazon Associate, Good Things Baking Co. earns from qualifying purchases.

About Sourdough Bread
Sourdough Bread is a traditional method for preparing bread. It uses a sourdough starter, made of wather and flour, which creates a growth of (good) bacterial yeast.
This yeast takes time to give your bread it's rise through a process called fermentation. Fermentation helps create a bread that has a complex flavor and is more easily digestible, which helps negate many of the difficulties that our bodies experience from eating bread products.
Here's an interesting graph showing the different in a blood sugar spike after eating a piece of conventional white bread versus sourdough bread. I'm not a doctor or nutritionist, so please, read up for yourself on the benefits of sourdough bread!

Soups to Eat in a Bread Bowl
You can put just about any soup into sourdough bread bowls! Here's a list of some of my favorites:
- French Onion Soup -- Top it with some of the bread bowl and melty swiss cheese, and you really can't beat this classic!
- Minestrone -- This pantry staple classic is hearty, healthy, filling, and just delicious inside a sourdough bread bowl!
- Cream of Mushroom Soup -- This recipe is vegan! If you follow a vegan diet, substitute the honey in the bread bowls with sugar instead.
- Vegetable Beef Soup -- Healthy Soup in hearty bread makes for a perfect winter's evening meal.
- Beef Noodle Soup with Prime Rib
- Turkey and Dumpling Soup
- Crockpot Lasagna Soup
Or fill these with any other type of soup, stew, or chowder you love!
Ingredients

Sourdough Starter -- you'll need fed, active sourdough starter for this recipe. That means it should be bubble and smell yeasty. The starter is what will give the bread bowls their rise.
All-Purpose Flour -- Use unbleached all-purpose flour. I used King Arthur Flour, so if you are using a different brand with a lower protein content (like Gold Medal) you may need to add a bit more flour for the right consistency.
Water -- I find that filtered water works the best for sourdough, since some of the impurities have been removed. This allows freer growth of the good bacteria, and can give you a better flavored bread.
Salt -- A high quality, fine ground sea salt works nicely into bread dough and delivers a great flavor.
Sugar or Honey -- A little bit of sugar or honey not only helps to feed the yeast bacteria in the sourdough, it also helps the crusts brown beautifully.
Tools You'll Need
Sourdough is actually a very, very simple recipe to make. You don't really need anything beyond a bowl, a baking scale, and a mixing utensil, like a wooden spoon or dough hook. And actually, that's optional, because you can mix the dough with nothing more than a clean hand!
Mixing Bowls: I really love these stainless steel mixing bowls from Crate & Barrel. I've used and loved them for years, and they still look so good! A large, clear, glass bowl is also a great option.
Baking Scale: While I don't always use a scale for baking, I never make bread without one. This scale from Taylor is similar to the version I have, and it's simple, affordable, and infinitely useful.
Bowls about 5" Across: These are for supporting the mini boules during the final rise. Cereal bowls lined with tea towels work well, or if you want to be fancy these mini banneton baskets are adorable!
Danish Dough Whisk: While you can use any large spoon or clean hands to mix bread dough, a danish dough whisk makes the job infinitely faster and easier.

How to Make Sourdough Bread Bowls
Mixing the Bread Dough


In a large mixing bowl, stir the active starter, water, and honey or sugar together. Add the flour and salt and combine until you have a rough, shaggy dough.


Cover the bowl with a clean dish towel and set it aside for thirty to sixty minutes. This is called the autolyse and allows the flour to be thoroughly absorbed and for the gluten and flavor to begin developing in the dough.

After thirty minutes to an hour, do a series of stretches and folds. Grab one side of the dough and slowly stretch it up, then fold it over. Turn the bowl a quarter turn and repeat the stretching/folding process 20-25 times.


Cover the dough again and let it rest for 30 more minutes, then do another set of 4-8 stretches and folds. Repeat this step one more time until you've done a total of three rounds of folds, including the first set of 20-25.
The dough is now ready for it's first rise.
A Note on Stretching and Folding the Dough:
Stretching and folding is the sourdough equivalent of kneading. However, traditional kneading will knock a lot of air out of your dough, which develops more slowly in sourdough. So opting for folding the dough gives you the gluten development without setting back your rising times.
With each series of folds, the dough should become smoother, stronger, and more elastic. This is the gluten developing.
The First Rise
Set the covered bowl of dough in a warm, draft free place. The ideal temperature is going to be 75°-82°F for optimal rising.
The first rise should take 4-6 hours, depending on the temperature of your proofing drawer or kitchen, or until the dough has increased by 50-75%.

Shaping the Bread Bowls
Once the dough has finished it's first rise, turn the dough out onto the counter and divide it into 6 equal pieces. If you wish to bake the following day, place the dough in the refrigerator at this point
Use your baking scale to weigh the dough, then divide that by six. Mine were about 273 grams each.

Take each ball of dough, and flatten it out gently, making sure not to deflate all of the air from it. Fold it in thirds in one direction, then the other.


Turn over the dough so that the seams are down. Cup your hand around the dough, and pull it across the counter towards yourself. This stretches the gluten on the outer edge of the dough, creating a strong "cloak" around the bread bowl. Rub it well with flour.

Repeat this process with each of the pieces of dough. Place each of the shaped mini loaves in a small bowl lined with a well-floured tea towel.

Cover the dough with the edges of the towels to prevent it from drying out. Allow it to rise in a warm place for about another hour.

Baking the Bread Bowls
To bake the bread bowls, heat your oven to 450°F. Use the fan (or convection) setting if you have it to help the bread bowls bake more evenly.
If you have a baking stone, place it in the oven before preheating. If not, bake them on a large baking sheet, with several inches of space in between to allow give them room to grow.
In a bowl, beat an egg with a tablespoon of water until it's smooth. Turn the loaves out onto parchment paper and brush off any extra flour. Don't worry if the loaves look a bit flat after turning them out--they'll spring up in the hot oven.


Using a pastry brush, brush the outside of each bread bowl with the egg wash. This gives you a nice, deep color on the crust.
Note: You may have to bake the bread in batches, depending on the size of your oven and baking sheet or stone. If so, only turn out the number you can bake at a time. Leave the rest in their forms while you're baking the first batch.
Score the tops of each bread bowl. Slide the parchment paper onto the baking stone or place the baking sheet in the oven.
Bake the bread bowls for 18 minutes, then reduce the heat to 375°F. Bake them for another 15 minutes, or until the crust is a deep golden brown.

Baking the Bread Bowls with Steam
Baking with steam is optional, but creates a crisp, sturdy crust that holds up better when there's soup inside. To create steam in your oven, place a rack in the center of it. Place another rack in the bottom of the oven and place a small metal pan (like a loaf pan) on one side of the oven.
Fill the pan at least half way with water and preheat the oven to 450°F. When you open the oven to put the bread in, add a cup of ice cubes to the pan immediately before closing the door.
The cold ice hitting the hot water in the pan will create steam in the oven. Close the door as quickly as possible to keep the steam in the oven.
The bread bowls will bake for the same amount of time with or without steam.
How to Serve Sourdough Bread Bowls
Allow the bread bowls to cool completely before cutting into them. The crumb is still cooking inside when they're still hot from the oven, so if you cut into them too soon the inside will be gummy and undercooked.
When you're ready to serve the bread bowls, cut off just the very top. Don't cut too far down into the bowl, or there won't be much space for soup inside.
After trimming off the top, use your fingers to pull out the centers of the bowl. Leave a bit of bread around the edges, but remove most of it.
Set the bread bowl on a plate and fill it with soup. You can serve it with the bread from the inside on the plate.
French Onion Soup in Bread Bowls
French onion soup in bread bowls is a favorite, and it's a delicious way to eat them! Slice off the top of the bread bowl and remove the center.
Fill the bread bowl with the soup, then set the flat top at an angle on the side of the bowl. Cover it with shredded Swiss cheese, then place it under a hot broiler for a couple of minutes. Leave it under the broiler for about 2 minutes, or until the cheese is melted and bubbly. Watch it carefully, as you don't want the cheese to burn.


Other Sourdough Recipes You May Enjoy:

Sourdough Bread Bowls
- Total Time: 9-26 hours
- Yield: 6 Large Bread Bowls 1x
Description
These homemade sourdough bread bowls are mini loaves of sourdough made to hold soups, stews, and chowders. Remove the centers of the crusty boules and create a delicious bowl. These can be made in about 8 hours or left for a longer overnight ferment, so they can fit into any schedule!
Ingredients
- 810 grams (6 cups) unbleached all-purpose flour
- 560 grams (2 ⅓ cups) filtered water, room temperature
- 284 grams (about 1 ¼ cups) active, bubbling sourdough starter.
- 21 grams (3 ½ teaspoons) salt
- 21 grams (1 Tablespoon) honey
Instructions
In a large mixing bowl, stir the active starter, water, and honey or sugar together. Add the flour and salt and combine until you have a rough, shaggy dough.
After thirty minutes to an hour, do a series of stretches and folds. Grab one side of the dough and slowly stretch it up, then fold it over. Turn the bowl a quarter turn and repeat the stretching/folding process 20-25 times.
Cover the bowl with a clean dish towel and set it aside for thirty to sixty minutes. This is called the autolyse and allows the flour to be thoroughly absorbed and for the gluten and flavor to begin developing in the dough.
Cover the dough again and let it rest for 30 more minutes, then do another set of 4-8 stretches and folds. Repeat this step one more time until you've done a total of three rounds of folds, including the first set of 20-25.
The dough is now ready for it's first rise.
Set the covered bowl of dough in a warm, draft free place. The ideal temperature is going to be 75°-82°F for optimal rising.
The first rise should take 4-6 hours, depending on the temperature of your proofing drawer or kitchen, or until the dough has increased by 50-75%.
Once the dough has finished it's first rise, turn the dough out onto the counter and divide it into 6 equal pieces. If you wish to bake the following day, place the dough in the refrigerator at this point
Use your baking scale to weigh the dough, then divide that by six. Mine were about 273 grams each.
Take each ball of dough, and flatten it out gently, making sure not to deflate all of the air from it. Fold it in thirds in one direction, then the other.
Turn over the dough so that the seams are down. Cup your hand around the dough, and pull it across the counter towards yourself. This stretches the gluten on the outer edge of the dough, creating a strong "cloak" around the bread bowl. Rub it well with flour.
Repeat this process with each of the pieces of dough. Place each of the shaped mini loaves in a small bowl lined with a well-floured tea towel.
Cover the dough with the edges of the towels to prevent it from drying out. Allow it to rise in a warm place for about another hour.
To bake the bread bowls, heat your oven to 450°F. Use the fan (or convection) setting if you have it to help the bread bowls bake more evenly.
If you have a baking stone, place it in the oven before preheating. If not, bake them on a large baking sheet, with several inches of space in between to allow give them room to grow.
In a bowl, beat an egg with a tablespoon of water until it's smooth. Turn the loaves out onto parchment paper and brush off any extra flour. Using a pastry brush, brush the outside of each bread bowl with the egg wash. This gives you a nice, deep color on the crust.
Note: You may have to bake the bread in batches, depending on the size of your oven and baking sheet or stone. If so, only turn out the number you can bake at a time. Leave the rest in their forms while you're baking the first batch.
then score the tops of each. Slide them onto the baking stone or place the baking sheet in the oven.
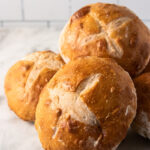
Bake the bread bowls for 18 minutes, then reduce the heat to 375°F. Bake them for another 15 minutes, or until the crust is a deep golden brown.
Allow the bread bowls to cool completely before cutting into them. The crumb is still cooking inside when they're still hot from the oven, so if you cut into them too soon the inside will be gummy and undercooked.
When you're ready to serve the bread bowls, cut off just the very top. Don't cut too far down into the bowl, or there won't be much space for soup inside.
After trimming off the top, use your fingers to pull out the centers of the bowl. Leave a bit of bread around the edges, but remove most of it.
Set the bread bowl on a plate and fill it with soup. You can serve it with the bread from the inside on the plate.
Notes
- The discrepancy in times listed (9-26 hours) is based on if you're baking the bread bowls on the same day you mix the dough. The longer time is for the overnight bulk rise option.
- Baking the Bread Bowls with Steam
Baking with steam is optional, but creates a crisp, sturdy crust that holds up better when there's soup inside. To create steam in your oven, place a rack in the center of it. Place another rack in the bottom of the oven and place a small metal pan (like a loaf pan) on one side of the oven.
Fill the pan at least half way with water and preheat the oven to 450°F. When you open the oven to put the bread in, add a cup of ice cubes to the pan immediately before closing the door.
The cold ice hitting the hot water in the pan will create steam in the oven. Close the door as quickly as possible to keep the steam in the oven.
The bread bowls will bake for the same amount of time with or without steam.
- Prep Time: 30 minutes (divided)
- Rising Times: 7-24 hours
- Cook Time: 1 ½ hours
- Category: Breads
- Method: Baking, Fermentation
- Cuisine: Bread
Comment Policy: I welcome any comments and feedback. And in the spirit of transparency, all comments will only be approved if left with a real first name and email address. You won’t be added to any email lists, but it’s simply to verify the comments are left by real people. Thanks for sharing your thoughts and input with me!


do i have to let them warm up if i did overnight bulk in the fridge?
Hi Brittany! If the bread bowls are sufficiently risen, you can bake them cold.
Rebecca, my question is concerning the recipe, I was under the impression that 6 cups of flour is 720 grams and not 810 grams. And that 2 2/3 cup of water is 638 grams and not 560 grams. Can you help me understand the amounts? And should I just use the Gram weight listed?
Thanks
Hi John, thanks for the questions! The variation in the cups vs. grams flour amount varies by brand. I would recommend going with the gram measurements, making any slight adjustments you think necessary to the dough. Happy baking!
1. So as I understand the baking directions, I can bake all six or two at the same temp and time, correct?
2. Also I have a large DO, a 5qtr. It seems like it will hold two. What is your opinion on using the 5qtr DO for two? I
This article is a very good one for sourdough boules and in general. New baker here and find it hard to get direct answers to a question. Look forward to your answer and opinion.
Barbara
Hi Barbara! Thanks for your comment, and sorry it's taken me a bit to get back to you. I'm glad you've found my recipe helpful!
Yes, the bake times and temperatures can be applied to all six boules or two--there shouldn't be any difference. Just know that each oven bakes a bit differently, so there may be a bit of difference based on your oven.
As for the Dutch Oven, I think it would be better to bake them out of it, since the will rise and would probably end up squished together. Unless it's an oval, then they would probably have space to grow side by side without being misshapen.
I'm so glad you've taken up baking, and hope you love it! Hope all of this helps.
Loved, loved, loved the is recipe!!! I do have a few questions, however. You share, “Once the dough has finished its first ride, turn the dough out onto the counter and divide it into 6 equal pieces. If you wish to bake the following day, place the dough in the refrigerator at this point.” - do I fold, shape, and turn seam side up before placing in the fridge or quite literally divide the dough and place those 6 pieces untouched in the fridge? Lastly, do I cover the pieces?
Hi Madeline, sorry I didn't see this sooner! The pieces of dough should be shaped and placed in their bowls before refrigerating, and then definitely covered before sitting overnight. Hope that helps!
Preparing for some blizzard Chilli and so excited to make these! Can I do the first rise overnight in the fridge?
Hi Aimee! What a perfect way to survive a blizzard! 🙂 Depending on how warm your house is at night, I would actually recommend doing the first rise on the counter overnight. Unless you keep your house over 70-72 degrees, it'll be a good temperature for the dough to be active without over rising. If your house is warmer, you'll want to let the first rise get a good start for several hours so the yeast has a chance to get going, and then pop it in the fridge over night. I hope that helps!
thanks for your recipe, I'm not sure if i do my bulk rise and plan on baking tomorrow, do I stick the covered dough the refrigerator over night or do I shape them into 6 balls and then refrigerate over night?
Looking forward to trying these over our holiday shutdown from work 🙂
Can they be frozen?
Hi Roberta, I'm so sorry I didn't see this sooner! This bread can deinitely be made ahead and frozen. Happy baking!