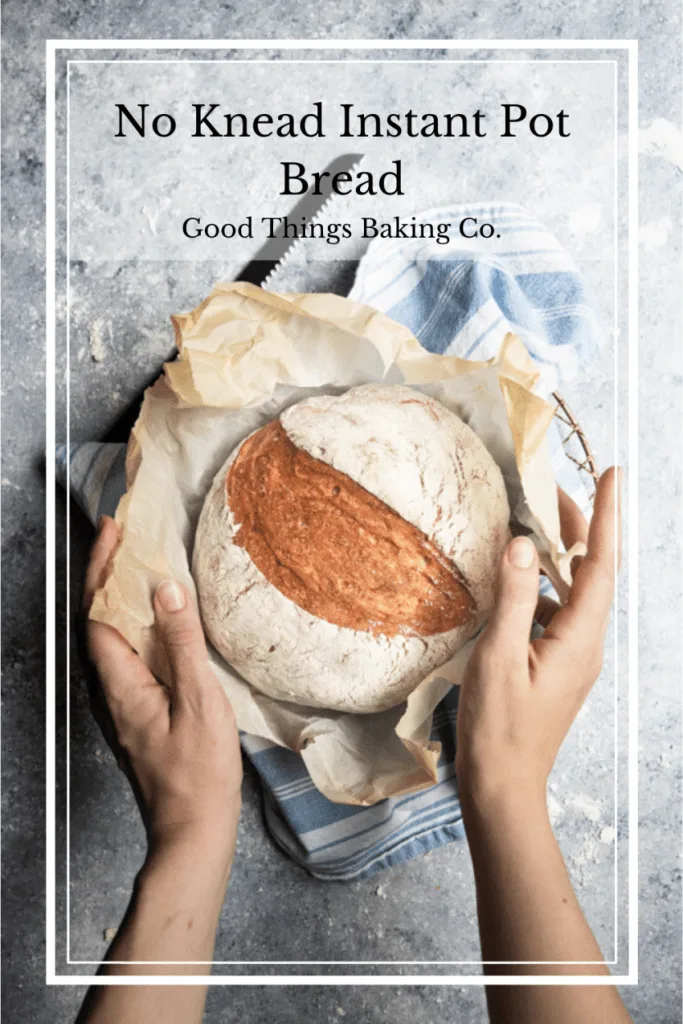
With this quick no knead bread, you get a loaf of crusty, artisan bread in less than two hours! Proofing the bread dough in the Instant Pot cuts down on the rise times dramatically.
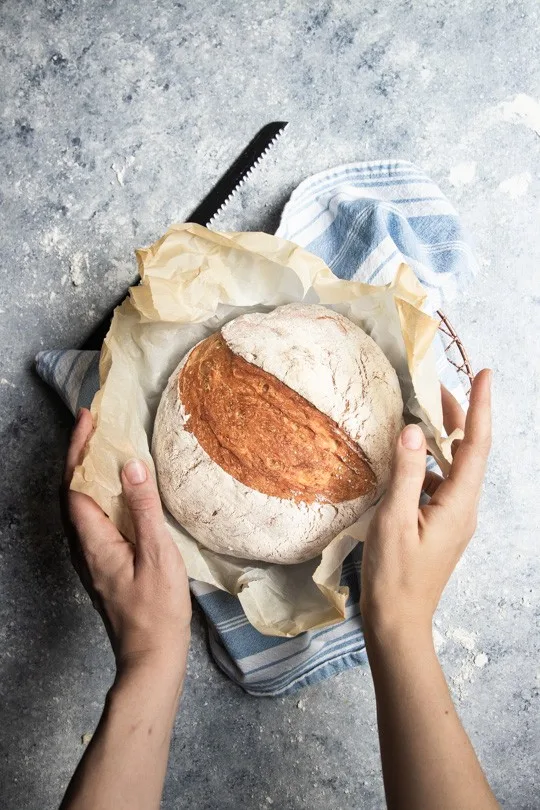
The smell of freshly baked bread in the air lends such an air of homey comfort, doesn’t it? And nothing tastes better than a crusty, warm loaf with a soft and tender crumb.
But those gorgeous loaves can take so. much. time. and effort. And most people don’t have either of those to spare. That’s what makes no knead breads so popular–they give us the fresh crust and crumb we crave while requiring little more than a quick mix and a few hours for the yeast to work it’s magic.
But what if I told you that even no knead bread just got easier? Even quicker than it already was? It truly is now, thanks to the Instant Pot. This Instant Pot No Knead Bread is truly the quickest, easiest way to get a perfect loaf onto your table and into your belly. Or you can turn it into your favorite sandwich, homemade garlic bread, or a spinach artichoke bread dip bowl.
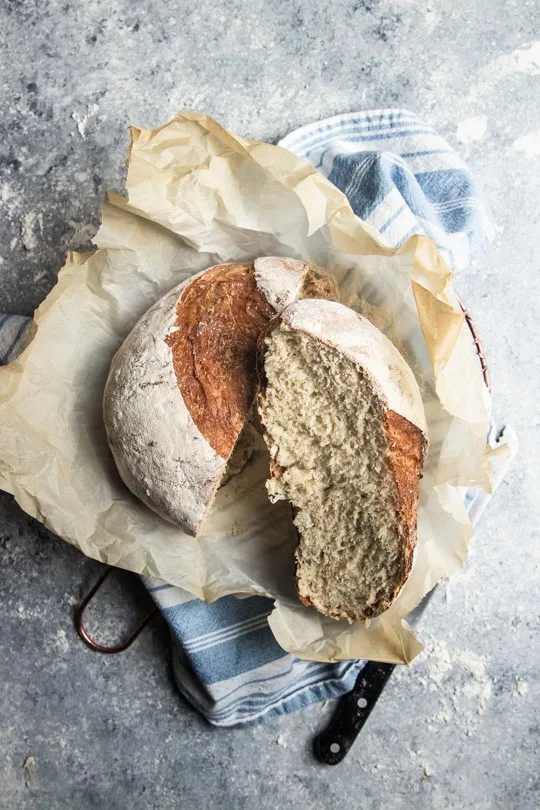
To Make Instant Pot No Knead Bread…
…the only tools you need are a smallish mixing bowl, a measuring cup, and wooden spoon, and, of course, an Instant Pot. Any size will work, as long as your mixing bowl will fit inside it. The ingredients are incredibly straightforward also. You probably have most of them on hand! You’ll need:
- Water
- Yeast
- Sugar
- Flour, all-purpose or bread
- Salt
How to Make Instant Pot No Knead Bread
- Start by placing 1 cup (8 oz.) of lukewarm water in a mixing bowl. It should be less than 110°F, or feel neither cold nor hot to the touch. Yeast is a living organism, and water that is too hot will kill it and your bread will not rise. Which would be really, really sad.
- Sprinkle 2 1/2 tsp. (8 g.) instant or active yeast over the water, then add 2 tsp. (8 g.) sugar on top of it and stir together. Allow the mixture to sit for 5-10 minutes, or until the yeast has dissolved and become bubbly and foamy. If it doesn’t do that, your yeast is dead and you’ll need to get new yeast before making bread.
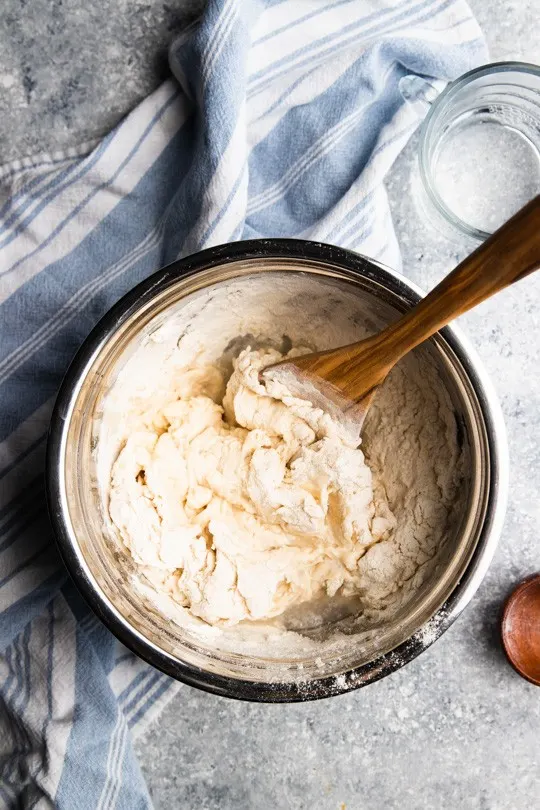
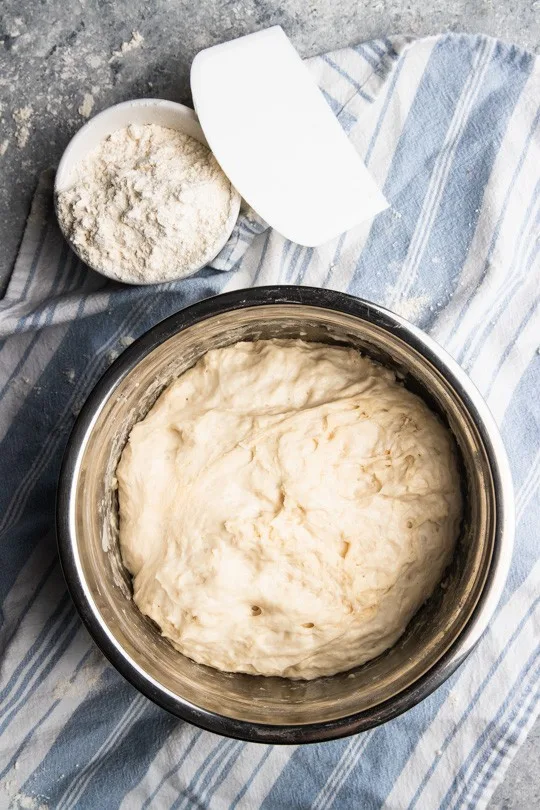
- Add the flour and salt to the water and yeast and stir together until a rough, shaggy dough starts to form. It’ll be very dry, so slowly stir in more water a tablespoon or two at a time until you have a soft, tacky (but not wet) dough.
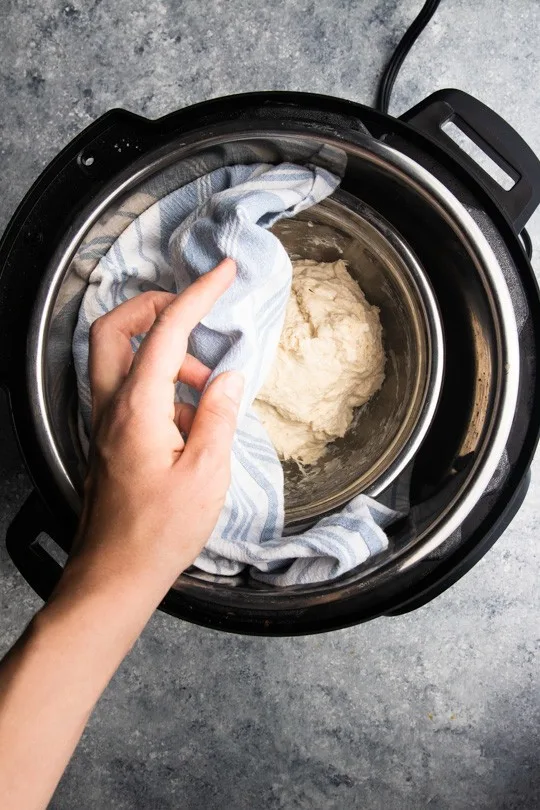
- Once your dough is thoroughly mixed, cover it with a clean towel and place the bowl in your Instant Pot. Push the yogurt button until the light is on the “Normal” setting, place the lid (a glass one will work too!) over the top, and allow it to sit for 25 minutes. The dough will not quite double, but should be puffy and noticeably risen.
- Preheat the oven to 425° with a Dutch oven, pizza stone, or baking sheet inside {see notes}.
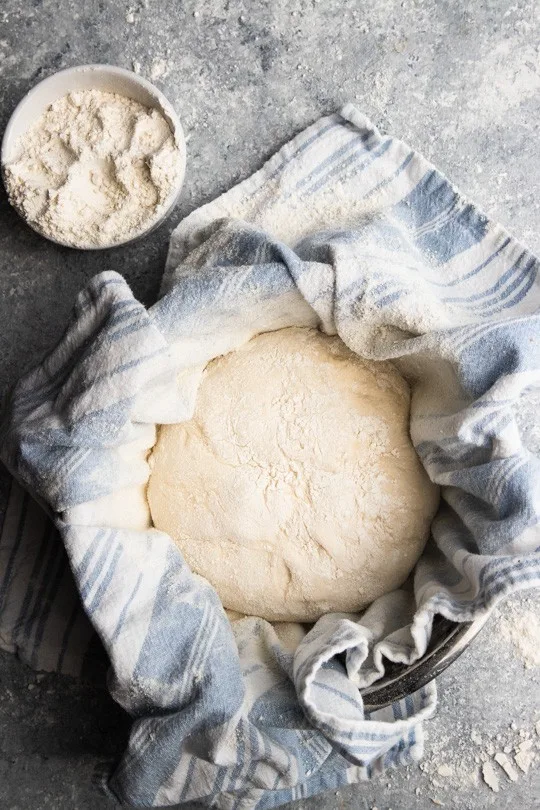
- After the dough has proofed for 25 minutes, remove the bowl from the Instant Pot. Turn it out on a clean towel that has been generously sprinkled and spread with flour–don’t skimp on the flour, since your dough will be rising in it and will stick there isn’t enough. Fold the edges of the dough up several times until it forms a tight ball, then pinch the bottom of the dough together.
- Pick up the corners of the towel, place it back in the bowl, and pop the bowl back in the Instant Pot on the yogurt setting for another 15 minutes.
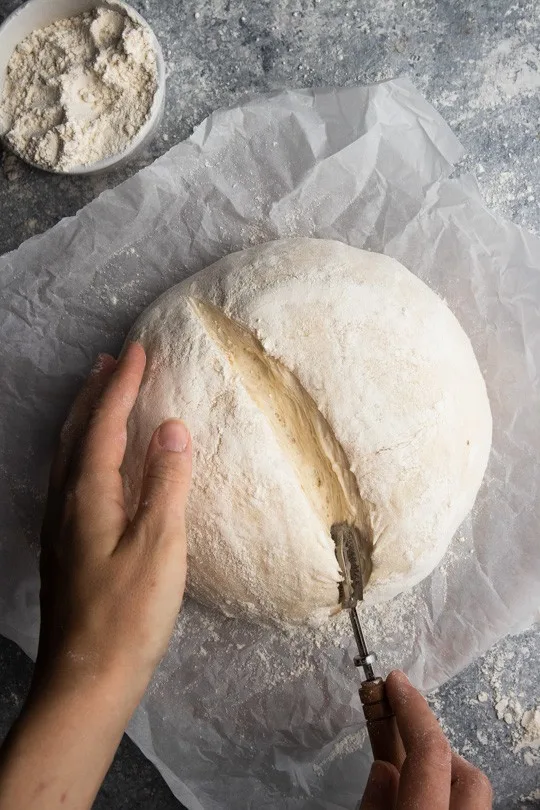
- Once the second rise is completed, remove the dough from the Instant Pot and turn it out onto a piece of parchment paper that’s set on top of a peel (you can use any edgeless, flat surface, like the back of a baking sheet). Using a baker’s lame or a sharp knife, cut a slash across the top of the loaf.
- Working quickly, open the oven, remove the Dutch oven lid, and slide the bread in. Replace the lid and close the oven door as quickly as possible.
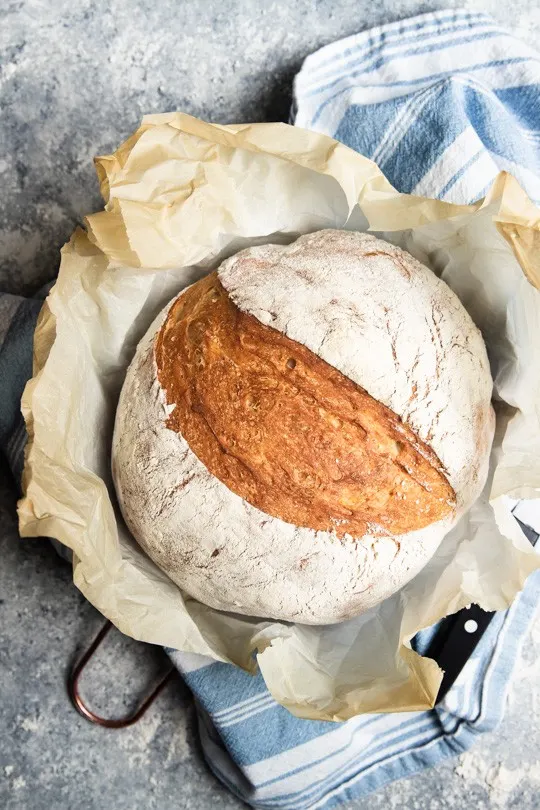
- Bake the bread for 25 minutes, then remove the lid and bake for another 10-15, or until the crust is a deep golden brown color and the bread sounds hollow when you tap it.
- Allow the bread to cool for at least 15 minutes, though an hour is even better.
- Slice and enjoy your Instant Pot No Knead Bread!
Recipe Notes
- If you’ve been around here for a while, I probably sound like a broken record, but I’ll say it again…if at all possible, bake by weight rather than by volume. Not only does it give you a more consistent, satisfactory result, it saves you dishes to wash (hurray!). If you do prefer to bake by volume, be sure to scoop flour into the cup with a spoon and scrape it off level, rather than using the cup itself as your scoop. That method will pack a lot of extra flour into the cup and you’ll have a drier dough.
- You can use all-purpose or bread flour for this recipe. Just be aware that different types of flour have different moisture absorption rates, so watch the dough consistency when adding water to make sure that it’s not too dry or wet.
- While this is a no knead bread recipe, giving the dough a few turns will give you better crumb structure. But there’s no need (Ha! no need…get it?) to turn the dough out on the counter and make a mess. Simply flour your hand, sprinkle a little more over the dough, and give it a few folds in the bowl. Voila!
- Scoring the top of your loaf may seem counterproductive in getting a rise, but it’s actually a very important part of a well shaped loaf. Scoring/slashing helps the bread rise up where it’s been cut since it’s getting less resistance where you’ve cut the gluten structure. Don’t worry if the loaf deflates a bit when you cut it–it’ll spring back up when it hits the heat of the oven.
- For the crustiest loaf, I recommend baking the bread in a cast iron Dutch oven.
- If you don’t have a Dutch oven, you can also bake on a pizza stone or a baking sheet. Whichever option you’re using, I recommend placing them inside the oven as it preheats. The heat from the baking surface will give your dough a better rise, also called oven spring, from hitting a very hot surface.
- Let your loaf rest for at least 15 minutes before slicing, though an hour is better. After it’s taken from the oven, it will continue to bake and slicing it too early could give you a gummy interior and a smashed loaf.
Bread Making Tools
Here are a few things that might make bread making easier for you. None of them are strictly necessary for this recipe, as long as you have a bowl, spoon, a way to measure, an Instant Pot, and an oven.
- Any mixing bowl that fits inside your Instant Pot work to proof the bread. This 3 quart mixing bowl is one of my favorite things in my kitchen, and it fits perfectly into an 8 quart IP.
- I use a Le Creuset Dutch oven (thank you, wedding registry!) for all of my artisan bread baking, and it really is a fabulous thing to have in your kitchen collection. However, they are definitely an investment piece. This one from Lodge is a more affordable option that will definitely do the job well!
- A baker’s lame (pronounced lahm) will make a quick, deep cut. However, a sharp, straight edged knife will also do the job.
- I really recommend using a bakers scale for a more consistent result and no measuring cups to wash. Win win. Here’s one that’s really affordable and works great.
- Bread is best sliced with a bread knife (I know, Captain Obvious here). Here’s the one I have and love!
Other Recipes You May Enjoy:
This post contains affiliate links, which means that if you purchase from any links in the post, Good Things Baking Co. will receive a small commission at no added cost to you. Thank you for being here, and helping support good recipes to make and eat!
Print
Instant Pot No Knead Bread
- Total Time: 1 hour 40 minutes
- Yield: 1 round loaf 1x
- Diet: Vegan
Ingredients
- 10 oz. (1 1/4 cups) lukewarm water, divided
- 8 g. (2 1/2 tsp.) instant or active dry yeast
- 8 g. (2 tsp.) sugar
- 420 g. (3 cups) flour, all-purpose or bread
- 9 g. (1 1/2 tsp.) salt
Instructions
Pour the lukewarm water into a mixing bowl then sprinkle the yeast and sugar over it. Stir it to get all of the yeast wet and let it sit for 5-10 minutes. The yeast on the top of the water should be bubbly and foamy. Add in the flour and salt and stir it all together until the dough is thoroughly mixed. It will still look rough.
Cover the top of the bowl with a clean tea towel and place it in the Instant Pot. Push the yogurt button on the IP until it’s on the normal setting, and let it rise for 25 minutes. Afterward, the dough should look puffy but won’t be doubled. Remove the bowl from the Instant Pot, uncover it, and spread a generous layer of flour over the tea towel that was over the top of the bowl. Dump the dough out onto it, then bring the edges of the dough up and around, pinching it together on the bottom to form a ball.
Preheat the oven to 450°F and place your dutch oven or baking stone inside.
Lift the corners of the towel with the ball of dough inside and place it back in the bowl. There may be some dough and flour on the inside, but it won’t mess up anything. Place it back in the Instant Pot, again on Yogurt setting, normal level, for another 15 minutes.
When the dough has completed it’s second rise, remove the bowl from the Instant Pot. Place a sheet of parchment down and carefully turn the dough out onto it. Carefully remove the floured towel and slash the loaf down the center.
Working quickly, open the oven and remove the lid from the Dutch oven. Gently place the loaf inside, replace the lid, close the oven and bake for 25 minutes. Remove the lid and bake for another 15-20 minutes, or until the bread is golden brown and sounds hollow when you thump it with your finger.
Remove the baked loaf from the oven, allow it to cool, then slice and enjoy.
- Prep Time: 10 minutes + 40 minutes rising time
- Cook Time: 50 minutes
- Category: Breads
- Method: Baking
- Cuisine: Baking


Victoria
Thursday 19th of January 2023
I love this recipe! What temperature is “normal” for yogurt on the instant pot?
Rebecca Neidhart
Saturday 21st of January 2023
Hi Victoria! It really depends on which model of Instant Pot you have. Normal is also called incubate, and is the lower setting of the two. The other setting is for boiling, and will be too hot for the yeast to survive. I hope that helps!
Barbara
Tuesday 16th of November 2021
best bread I have made to date, and so fast!!! Thank you!!
Craig
Tuesday 10th of August 2021
Could you please not use such a faint shade of gray in your text? It makes it hard to read. I know you likely don't want anything "loud," but the text on your site is uncomfortably hard to read.
18 Instant Pot Dinner Recipes That Anyone Can Cook - The Guide Inc.
Friday 5th of June 2020
[…] From @goodthingsbakingco: click here to view. […]