This French Baguette Recipe will yield a classic, crusty baguette, authentic and reminiscent of Parisian boulangeries.

Can I confess something? I miss France. Almost always, there’s the dream of returning (maybe living there?) someday, and usually I have some half-concocted plan for how to go back.
It’s the simpler way of life, a certain je ne sais quoi that leaves me feeling homesick every time we leave and longing to return. And though the general insanity of the world at the moment paired with parenting small children (a seven-hour time change sounds like hell on earth), someday I’ll get back to the land of buttery croissants, hundreds of cheeses, and the daily baguette.
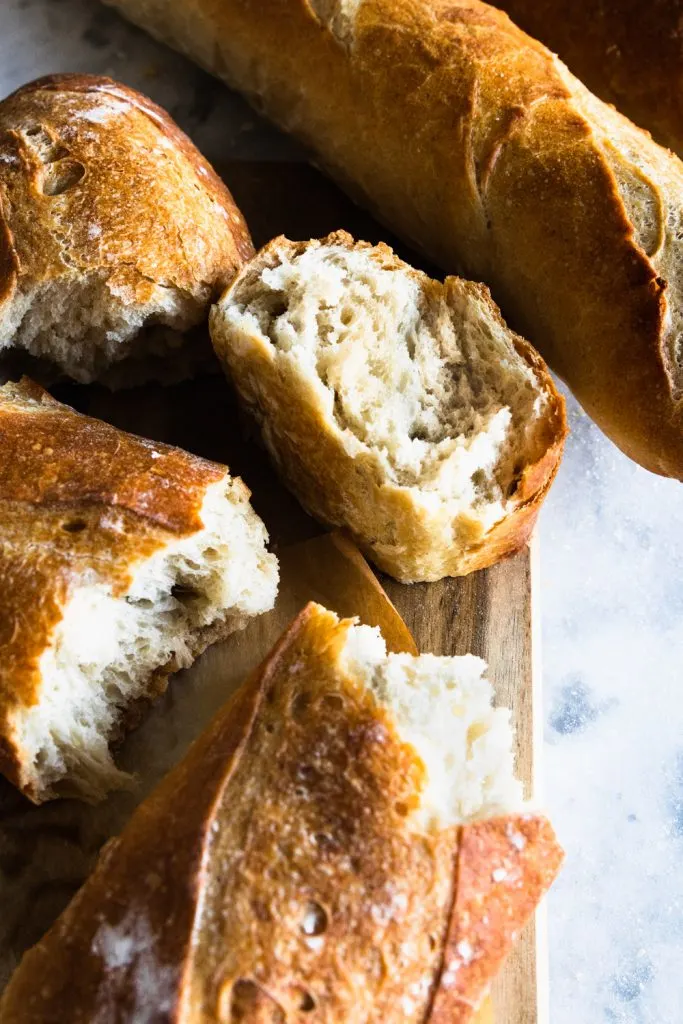
This classic french baguette recipe is like taking a mini-trip to France. It’s based on a recipe from Peter Reinhart. And not to brag, but these baguettes actually won a bread contest at my local farmer’s market. They’re as close to perfect as you can get, with a crusty, crisp exterior and a tender, soft crumb.
Making this French Baguette Recipe
The process to achieve perfectly crusty Parisian baguettes has two stages (each with several steps) and takes 2-3 days. Each step requires just 20-30 minutes of time, with long rises and rests in between. All that to say, don’t be scared off by the time commitment!
An Overview of the Process
The first step is creating a pre-fermented dough, or pâte fermentée. This is simply a dough that you make 1-3 days before your baguettes. As bread dough sits, it matures and develops a deeper and more complex flavor. This leads to not only a better flavor but also a better rise to your finished dough.
The day after making your pre-ferment, you’ll make the baguette dough with 1 pound of it, allowing it to go through one long and one short rise before shaping the loaves. At this stage, you can give the shaped loaves their final rise and then bake them.
Or, if possible, allow them to sit overnight in the refrigerator. This long, slow rise will yield a deeper color and a blistery, shattering crust, some of the hallmarks of a superior baguette.
Now that we’ve covered the basics, let’s get baking, shall we?
Making the Pre-fermented Dough
- To make the pre-fermented dough, mix together all-purpose and bread flours, salt, and yeast. Next, add the water and stir together until a rough dough forms. I like to use a clean hand to finish the mixing, as I find a spoon becomes clumsy.
- Once you have a dough (it will be very rough and shaggy), turn it out onto a floured counter and begin to knead it. If it is too sticky and leaves wet dough all over your hands work in a bit more flour until it is a workable, but soft dough. If it’s too dry, add a teaspoon or two of water at a time to create a supple, soft dough. Knead the dough until it is smooth and elastic, for about 10 minutes. If you place a probe thermometer in the dough, it should read between 77° and 80°F. It will feel neither warm nor cold when you touch it.
- Place the dough in a clean bowl that gives it space to rise then cover it with plastic wrap or place it in a clean plastic bag. Allow it to sit in a warm, draft-free place until it has doubled. This should take 1-1 1/2 hours but could take less or more time depending on the temperature of your kitchen.
- Remove the risen dough and knead it to deflate. Reshape it into a ball, place it back in the bowl and recover, then refrigerate it overnight. The next day, remove it about an hour before you wish to make your baguette dough to bring it to room temperature.
Making the French Baguette Dough
Begin your baguette dough at least 6 hours before you want to bake them. You can also refrigerate the finished dough for up to 24 hours after the rises and before shaping your loaves, though this extra time is optional.
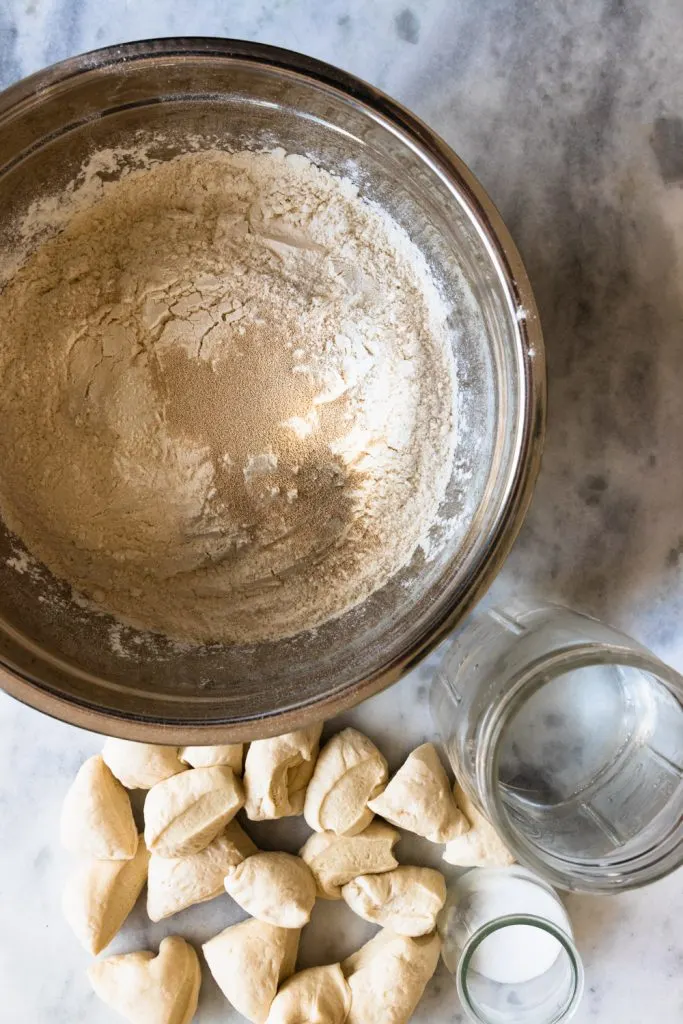
- Stir together the 490 grams of all-purpose flour, 455 grams of bread flour, 30 grams of whole wheat flour, and 1 1/4 tsp. instant yeast in a large mixing bowl.
- Add in the 26.3 oz. of water and stir it in with a large, sturdy spoon until you have a rough, shaggy dough.
- Set the dough aside for 20 minutes–this rest is called the autolyze. It helps the yeast begin to work and the flavor to begin to develop.
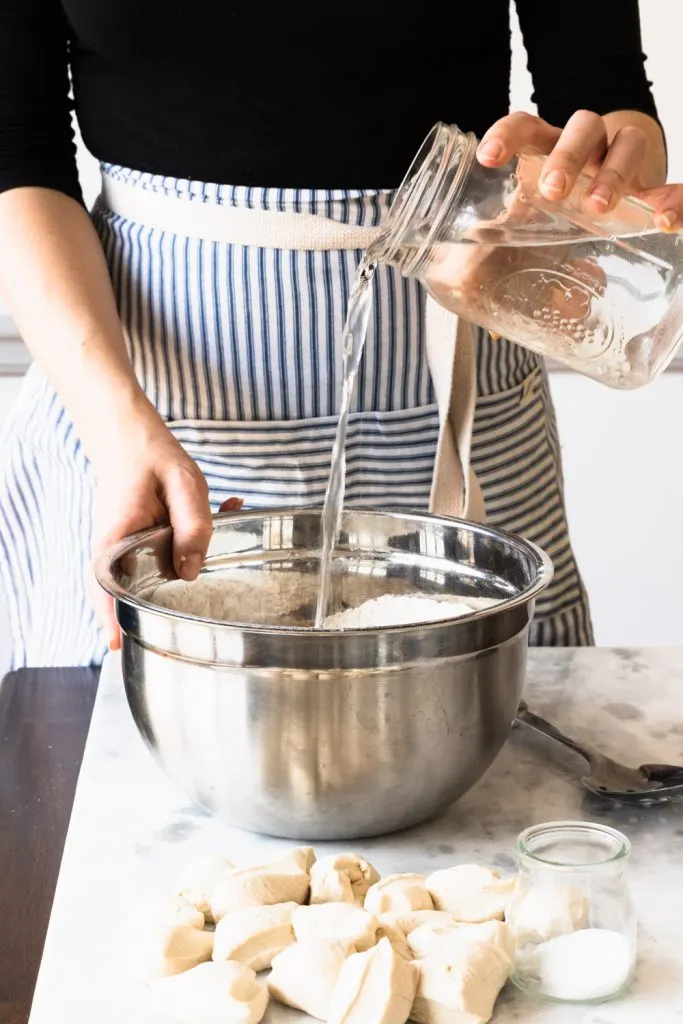
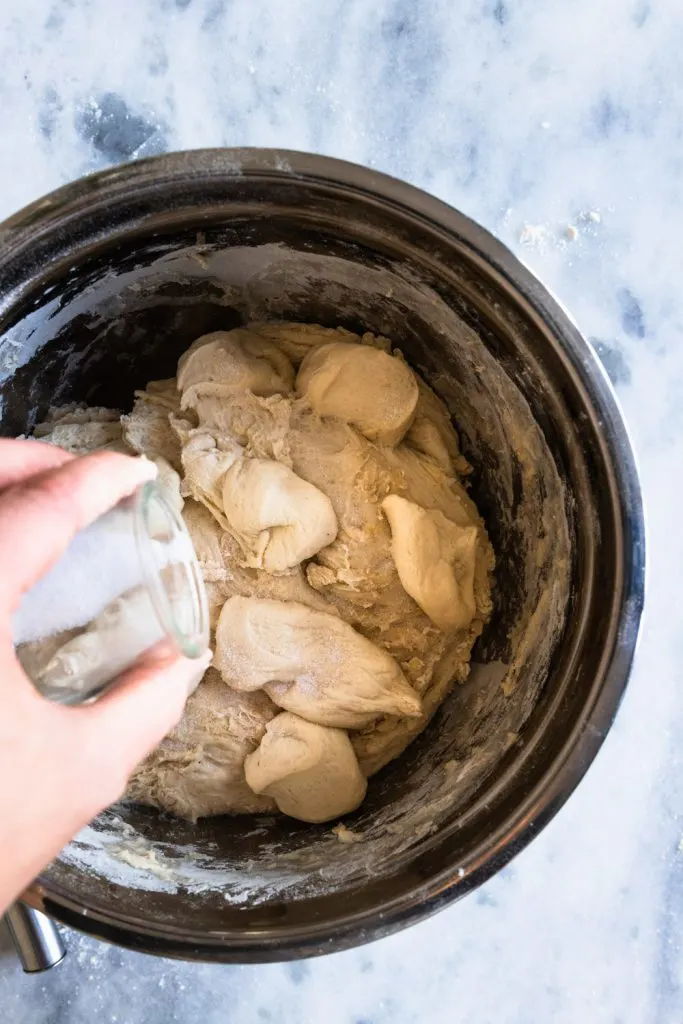
- After the autolyze is complete, cut 1 lb. of the pre-fermented into about 12 small pieces and put about half of them over the dough. Sprinkle the salt over them, and fold the edges of the dough around it to cover the pre-ferment. Repeat with the rest of the pre-ferment pieces and salt.
- Turn the dough out onto a lightly floured surface and begin to knead it. Your dough should be soft, supple, and tacky, but not sticky. If it is too dry, add water a tablespoon at a time to achieve the desired texture. If it’s too wet, work in more all-purpose flour a little bit at a time until the dough can be worked easily.
- Knead the dough until it is smooth and elastic, about 10-15 minutes. See the note on kneading under the notes for how to know when the dough is well-kneaded and ready to rise.
- Set the kneaded dough in a bowl that’s large enough to allow it to double. Place it in a plastic bag (I like to use a large, new, clean trash bag since I can reuse it after I’m finished with the bread) or cover it with a clean cloth.
- Allow it to rise for about 30 minutes, or until the dough has puffed slightly. Knead it for a few seconds, reshape it into a ball, and place it back into the bowl.
A Note on Mixing French Bread with a Kitchenaid or Other Mixer
While I like to make French bread by hand, you can absolutely use your Kitchenaid or other stand mixer using the dough hook. Follow the same steps for mixing by hand, but mix the dough on low. Any kneading steps should be done at medium speed. All of the same methods (like testing for when the dough is thoroughly kneaded) apply, the mixer just makes this French baguette recipe that much easier!
- Re-cover the dough and allow it to rise for another 2 hours, or until it has doubled in size.
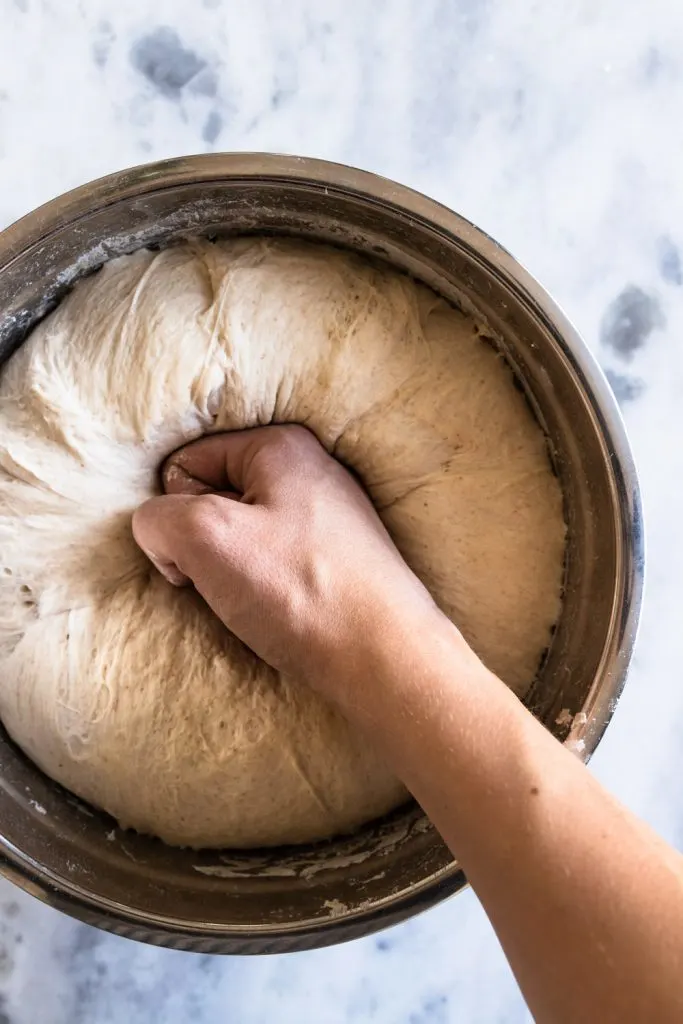
- Deflate the dough and turn it out onto a lightly floured surface. You should have about 4 1/2 lbs. of dough. Divide it into four equal portions, each about 1 lb. 2 oz. Your baguettes are now ready to shape.
How to Shape the Baguettes
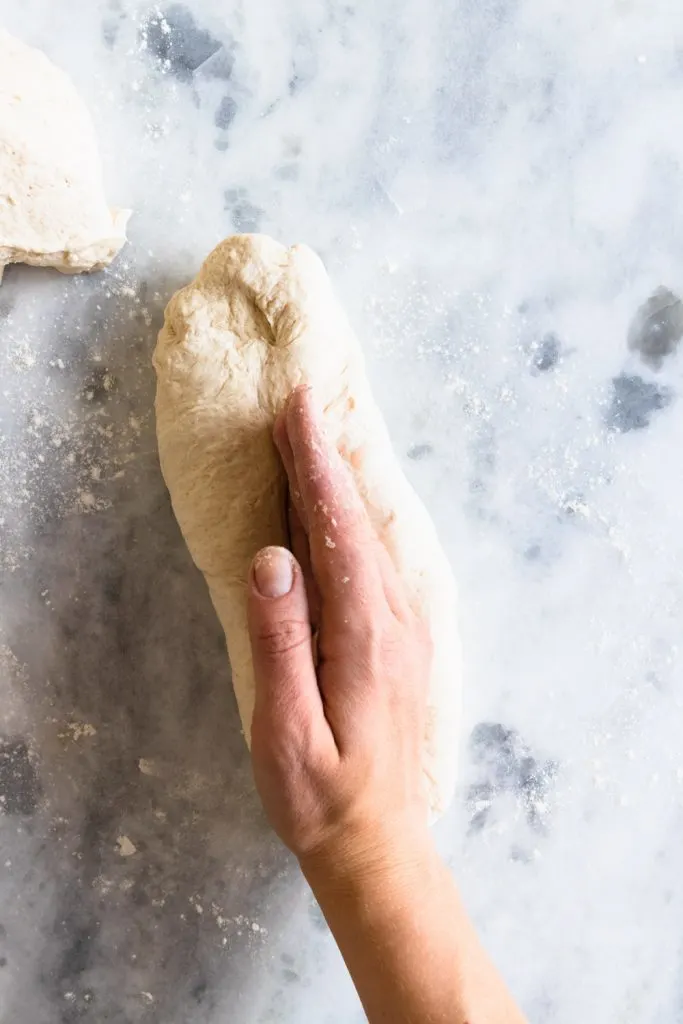
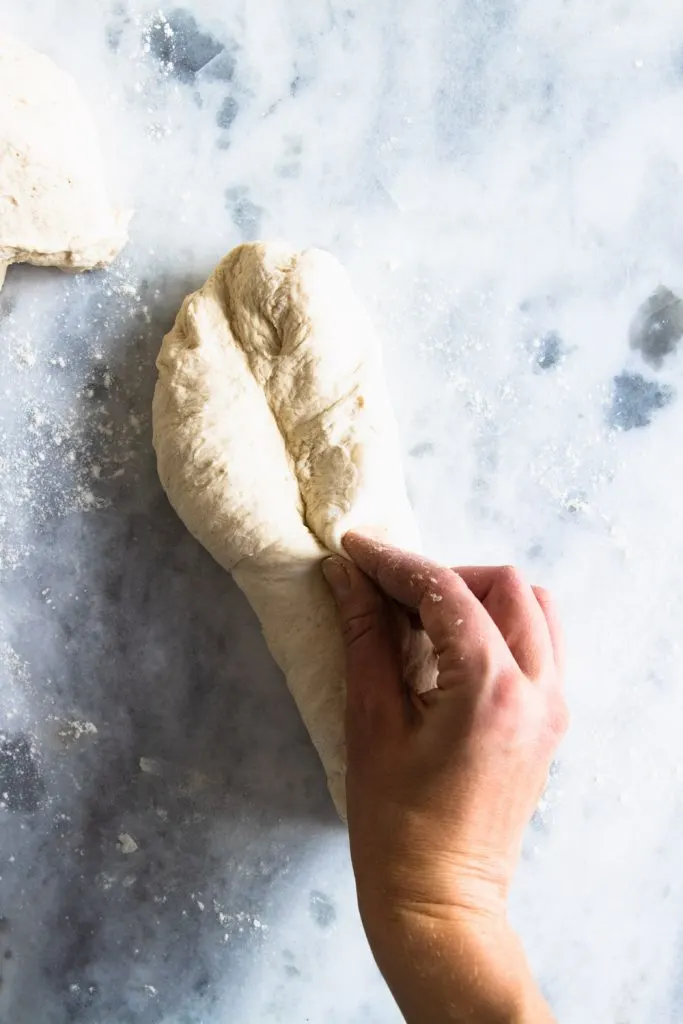
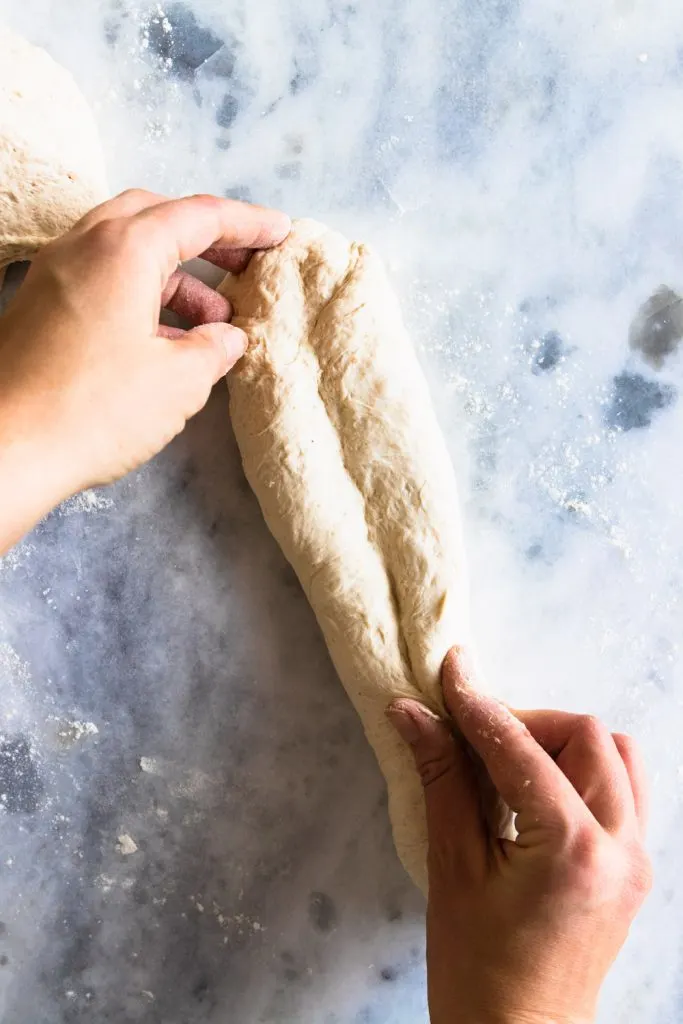
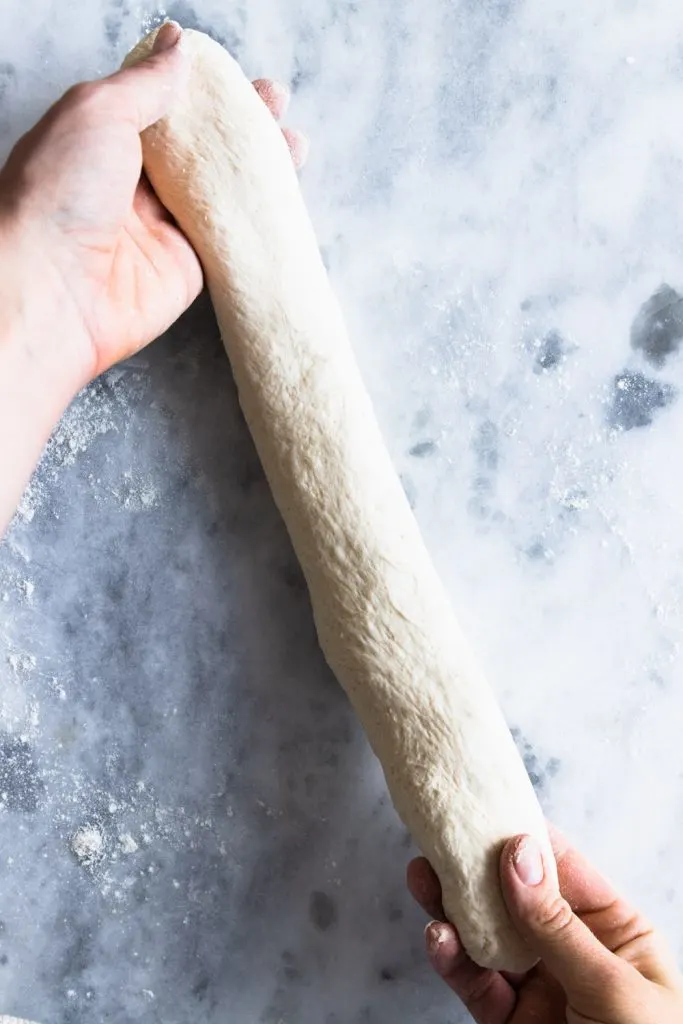
Set the fully shaped loaves on parchment sheets sprinkled with flour, then place them on a baking sheet and into the same clean plastic bag to rise. You can allow them to rise at room temperature for 45 minutes to 1 hour, or until the baguettes look puffy and soft. Alternatively, place the shaped loaves in the refrigerator overnight and allow them to have a long, slow rise. This creates a more blistery, crackly crust and gives your baguettes a deeper finished flavor and color.
Do I need a baguette pan to make French Baguettes?
The short answer is no. Because of the gluten structure created by the kneading and shaping steps, your loaves can be baked on a flat sheet pan and maintain their shape. However, if you would like to use a baguette pan, they can be a great way to add a little peace of mind! These ones from Amazon are an affordable option, but it’s important to note that your baguettes will be approximately three inches longer than the pan. Be sure to support the ends that might hang off while you move the loaves to the oven.

How to Bake French Baguettes
The bake is an important part of crusty, chewy baguettes. The temperature, slashing, and steam all play a role in that perfect baguettes, so don’t be discouraged if you have to tinker a bit and get all of the elements perfect.
Creating Steam in Your Oven for a Better Crust
- Start by preheating your oven to 500°F with a rack in the center. If you have unglazed ceramic tiles or a break or pizza stone, place it in the oven to help even out the heating in the oven and replicate the effect of a brick oven. Also, place a metal pan on a lower oven rack. You’ll add water to this when you place the baguettes in the oven, creating a steamier atmosphere which, in turn, creates a crustier loaf.
- Set out a two cup measuring cup of cold or ice water and have a spray bottle of cold water handy.
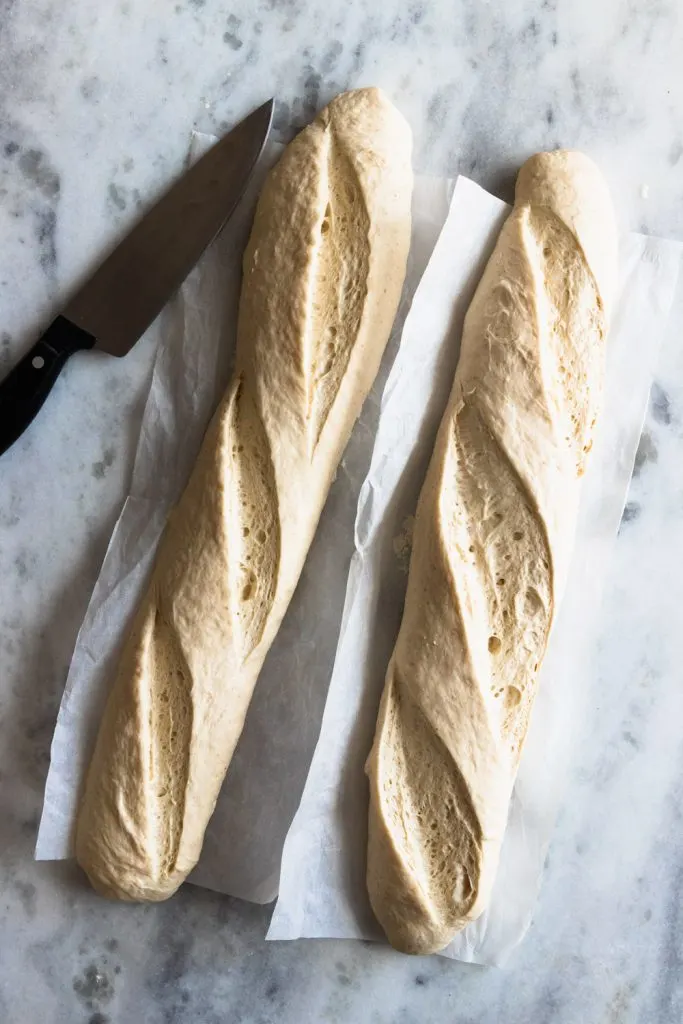
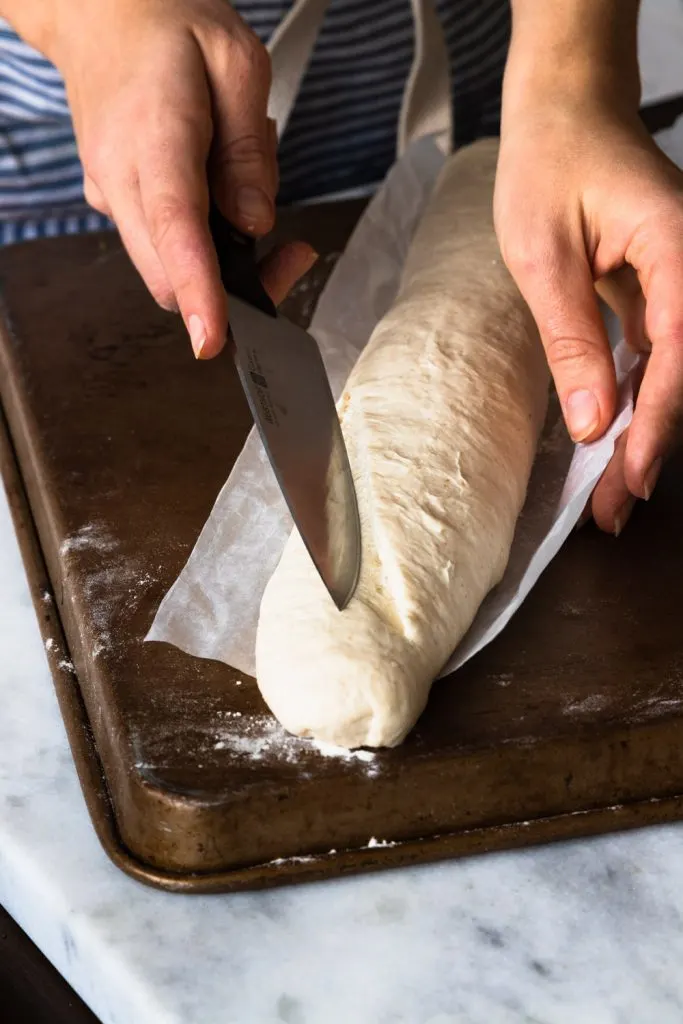
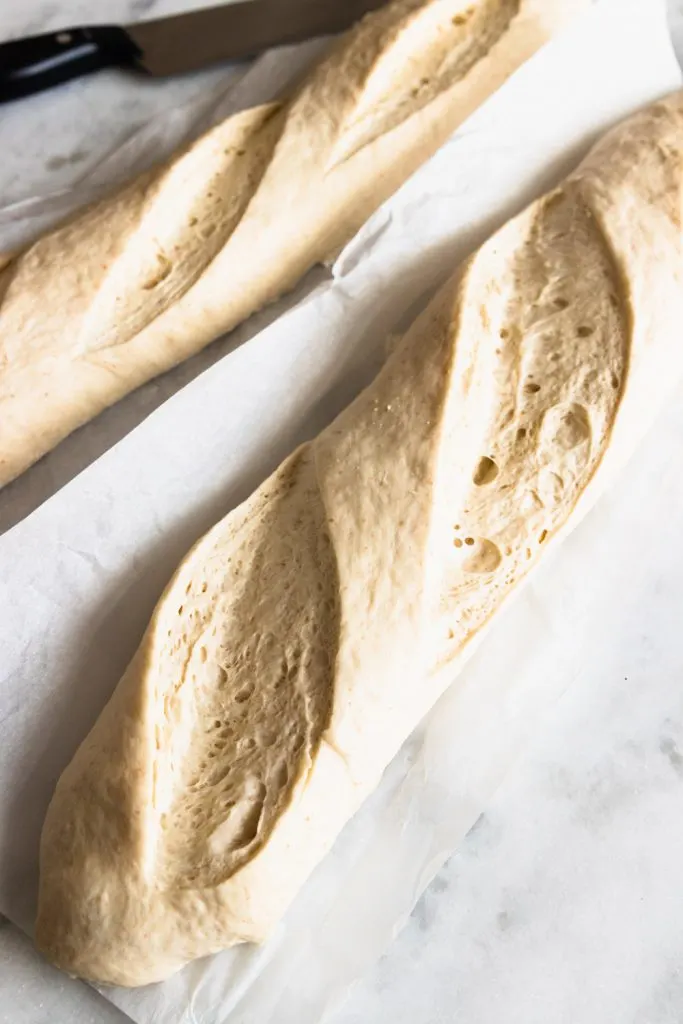
- When the oven has preheated, use a very sharp chef’s knife or bread lame to create three angled slashes down to top of the baguette. Hold your blade at approximately a 45° angle to help create an “ear” on the slashes.
- Working quickly, Open the oven and place the baguettes inside on the centered rack. Pour the cold water the pan and shut the door quickly.
- Allow the loaf to bake for 2 minutes, then open the door and quickly spray the walls and loaves with cold water. Bake for another minute, then repeat the spraying.
- After spraying the loaves a second time, turn the temperature down to 450°F and bake for approximately 15 more minutes, turning the baguettes half way through to help them bake evenly.
- Remove them from the oven when the crusts are a deep golden brown
- Enjoy your delicious French baguettes!
The Best Kind of Flour for this French Baguette Recipe
In France, le baguette is made with a particular flour called T55. The major difference in types of American white flour (bread flour vs. all-purpose) is the gluten content, and T55 lands somewhere between those two. So! For this French baguette recipe, I like to use almost a straight half and half blend of bread and all-purpose flours, with a tiny bit of the bread flour replaced with either whole wheat or rye flour for a bit of added texture. If you don’t have either of those on hand, feel free to make up the difference in bread flour.
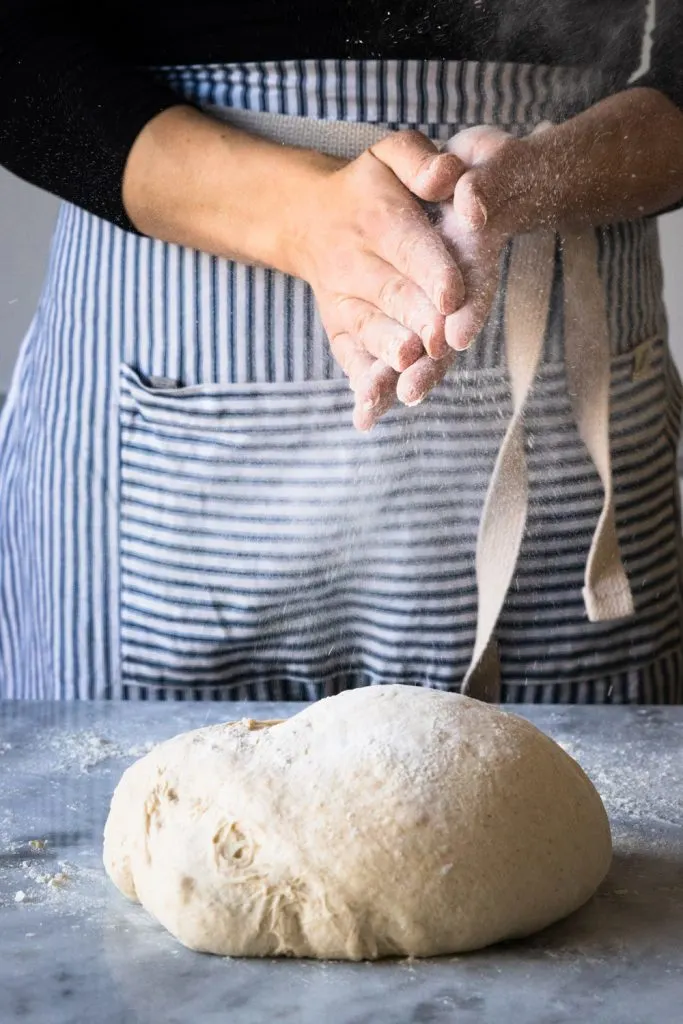
Tips for Kneading Bread Dough
- The purpose of kneading is to activate the gluten in the dough, which gives the finished loaf structure and shape.
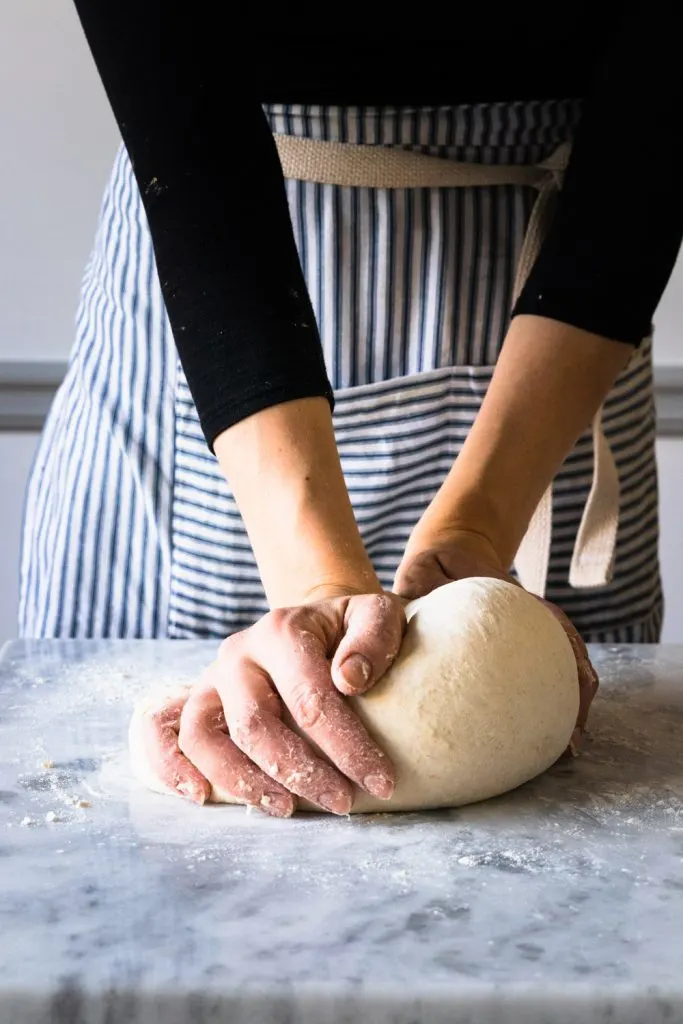
- To knead, use the heel of your hand to stretch across the top of the dough. Pushing down won’t actually work the dough very well. Next, fold over the dough and repeat the push and stretch. Continue doing this until the gluten is developed.
- You’ll feel the difference in the dough as the gluten is worked. It’ll become more elastic, and stick to your hands less. That isn’t because the dough is drying out, it’s because the structure is holding the dough together.
- If you’re wondering how to know when the gluten is fully developed, there are several ways to tell! My favorite is the windowpane test. Simply take a small bit of dough and gently stretch it until it’s thin enough to see light through it (like a windowpane!). If the dough is tearing, the gluten isn’t properly developed, but it is stretching to the point of transparency, the dough is perfect!
- Another way to gauge your gluten is to simply press into your dough quickly. If the dough springs back after you pull your finger away, it’s getting there! If an indent stays behind, you need to keep working that dough. I still recommend the windowpane test as a more definite way to check your progress.
- Don’t overknead! If you keep kneading, the gluten will start to break down and you’ll have as sticky mess of dough that can’t be saved. But also don’t worry too much, as it takes a LONG time to overknead dough.
While it may look long and complicated, this French baguette recipe is actually quite simple. Once you’ve learned and understand the techniques, you’ll be baking baguettes like a boulanger and spreading that crackly crusted goodness to everyone you meet. Happy, happy baking (and of course, eating)

P.S. If you really want to take this baguette experience to the next level, look for some good French butter to smear on top. Trader Joe’s has an excellent imported butter, and there are several brands that are commonly found in grocery stores.

Other Recipes You May Enjoy:
Print
French Baguette Recipe
- Total Time: 30 hours 18 minutes
- Yield: 4 baguettes 1x
Ingredients
For the Pre-Ferment Dough
- 1 3/4 cup (245 g) unbleached all-purpose flour
- 1 3/4 cup (245 g) unbleached bread flour
- 1 1/2 tsp. (9 g) fine grain sea salt
- 1 tsp. (3 g) instant yeast
- 1 1/4 cups (10 oz.) cool water, around 70°F
For the Baguette Dough
- 1 lb. (4 cups, 455 g) pre-fermented dough
- 3 1/2 cups (490 g) all-purpose flour
- 3 1/4 cups (455 g) bread flour
- 1/4 cup (30 g) whole wheat flour
- Room temperature water- 663g/26.3 oz./3 cups +5 Tbsp./ 778 ml
- 2 1/2 tsp. (15 g) salt
Instructions
For the Prefermented Dough:
To make the pre-fermented dough, mix together all-purpose and bread flours, salt, and yeast. Next, add the water and stir together until a rough dough forms. I like to use a clean hand to finish the mixing, as I find a spoon becomes clumsy.
Once you have a dough (it will be very rough and shaggy), turn it out onto a floured counter and begin to knead it. If it is too sticky and leaves wet dough all over your hands work in a bit more flour until it is a workable, but soft dough. If it’s too dry, add a teaspoon or two of water at a time to create a supple, soft dough. Knead the dough until it is smooth and elastic, for about 10 minutes. If you place a probe thermometer in the dough, it should read between 77° and 80°F. It will feel neither warm nor cold when you touch it.
Place the dough in a clean bowl that gives it space to rise then cover it with plastic wrap or place it in a clean plastic bag. Allow it to sit in a warm, draft-free place until it has doubled. This should take 1-1 1/2 hours but could take less or more time depending on the temperature of your kitchen.
Remove the risen dough and knead it to deflate. Reshape it into a ball, place it back in the bowl and recover, then refrigerate it overnight. The next day, remove it about an hour before you wish to make your baguette dough to bring it to room temperature.
For the Baguette Dough:
Begin your baguette dough at least 6 hours before you want to bake them. You can also refrigerate the finished dough for up to 24 hours after the rises and before shaping your loaves.
Stir together the 490 grams of all-purpose flour, 455 grams of bread flour, 30 grams of whole wheat flour, and 1 1/4 tsp. instant yeast in a large mixing bowl.
Add in the 26.3 oz. of water and stir it in with a large, sturdy spoon until you have a rough, shaggy dough.
Set the dough aside for 20 minutes–this rest is called the autolyze. It helps the yeast begin to work and the flavor to begin to develop.
After the autolyze is complete, cut 1 lb. of the pre-fermented into about 12 small pieces and put about half of them over the dough. Sprinkle the salt over them, and fold the edges of the dough around it to cover the pre-ferment. Repeat with the rest of the pre-ferment pieces and salt.
Turn the dough out onto a lightly floured surface and begin to knead it. Your dough should be soft, supple, and tacky, but not sticky. If it is too dry, add water a tablespoon at a time to achieve the desired texture. If it’s too wet, work in more all-purpose flour a little bit at a time until the dough can be worked easily.
Knead the dough until it is smooth and elastic, about 10-15 minutes. See the note on kneading under the notes for how to know when the dough is well-kneaded and ready to rise.
Set the kneaded dough in a bowl that’s large enough to allow it to double. Place it in a plastic bag (I like to use a large, new, clean trash bag since I can reuse it after I’m finished with the bread) or cover it with a clean cloth.
Allow it to rise for about 30 minutes, or until the dough has puffed slightly. Knead it for a few seconds, reshape it into a ball, and place it back into the bowl.
Re-cover the dough and allow it to rise for another 2 hours, or until it has doubled in size.
Deflate the dough and turn it out onto a lightly floured surface. You should have about 4 1/2 lbs. of dough. Divide it into four equal portions, each about 1 lb. 2 oz. Your baguettes are now ready to shape.
Shaping the Baguettes:
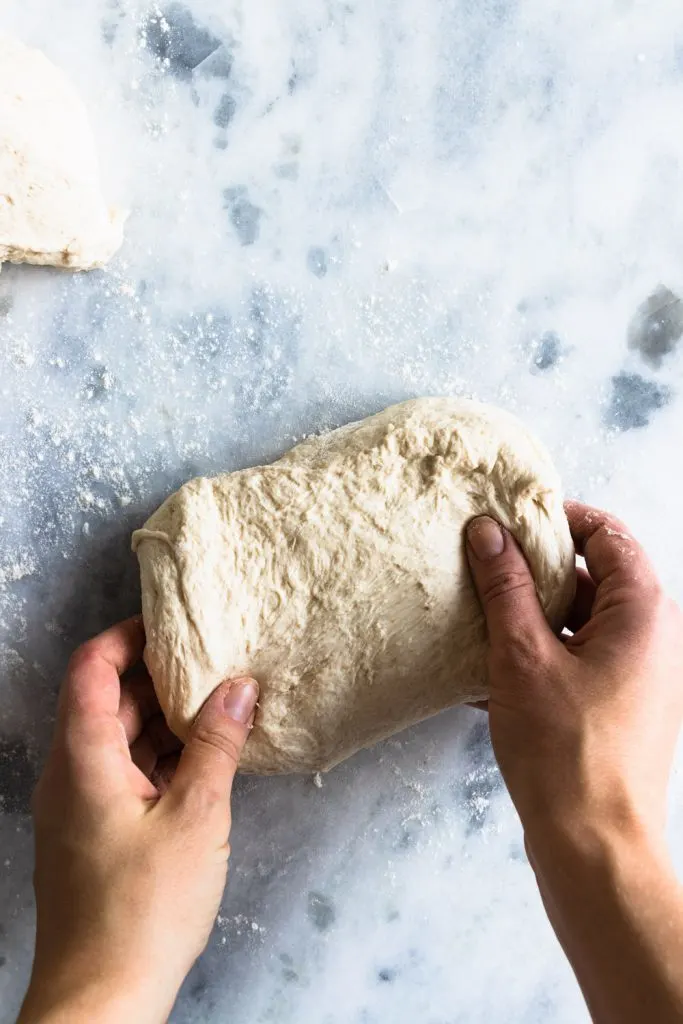
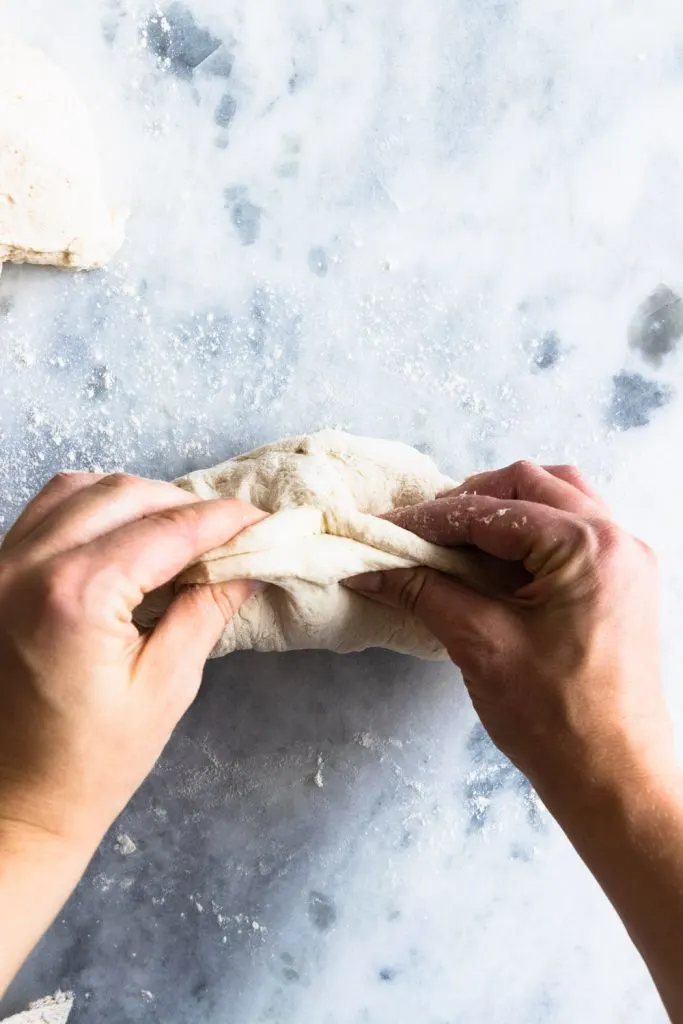
I’ve included pictures above to help guide you through the shaping process–take a minute to check them out!
To shape a baguette, create a long rectangle with one portion of the dough. Pinch together the edges of the dough, then use the edge of your hand to press down the seam. Bring around the edges of the dough and pinch them together again, then press it down with the edge of your hand. Repeat this process again.
Gently pull and stretch the baguette to make it approximately 18″ long. You can also wrap your hand around it and carefully slide and stretch the dough until it’s the appropriate length. If it keeps springing back after you’ve stretched it, allow the dough to sit for about 10 minutes (this helps the gluten relax), then try again. Tuck the ends of the loaf under and pinch them in place for a rounded end.
Set the fully shaped loaves on parchment sheets sprinkled with flour, then place them on a baking sheet and into the same clean plastic bag to rise. You can allow them to rise at room temperature for 45 minutes-1 hour, or until the baguettes look puffy and soft. Alternatively, place the shaped loaves in the refrigerator overnight and allow them to have a long, slow rise. This creates a more blistery, crackly crust and gives your baguettes a deeper finished flavor and color.
To Bake the Baguettes:
Start by preheating your oven to 500°F with a rack in the center. If you have unglazed ceramic tiles or pizza stone, place it in the oven to help even out the heating in the oven and replicate the effect of a brick oven. Also, place a metal pan on a lower oven rack. You’ll add water to this when you place the baguettes in the oven, creating a steamier atmosphere which, in turn, creates a crustier loaf.
Set out a two cup measuring cup of cold or ice water and have a spray bottle of cold water handy.
When the oven has preheated, use a very sharp chef’s knife or bread lame to create three angled slashes down to top of the baguette. Hold your blade at approximately a 45° angle to help create an “ear” on the slashes.
Working quickly, Open the oven and place the baguettes inside on the centered rack. Pour the cold water the pan and shut the door quickly.
Allow the loaf to bake for 2 minutes, then open the door and quickly spray the walls and loaves with cold water. Bake for another minute, then repeat the spraying.
After spraying the loaves a second time, turn the temperature down to 450°F and bake for approximately 15 more minutes, turning the baguettes half way through to help them bake evenly.
Remove them from the oven when the crusts are a deep golden brown
Enjoy your delicious French baguettes!
- Prep Time: 30 hours (includes all rises and making the prefermented dough)
- Cook Time: 15-18 minutes
- Category: Breads
- Method: Baking
- Cuisine: French


What To Serve With Beef Stew? 18 Amazing Side Dishes - 2,100 Best Keto Snacks
Saturday 4th of September 2021
[…] French baguette […]