Description
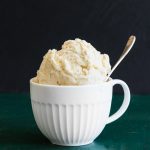
This classic vanilla bean ice cream is a great accompaniment to almost any dessert, or perfection on it’s own!
Ingredients
- 1 cup (8 oz.) whole milk, divided
- 2 cups whipping cream, divided
- 3/4 cup (150 g) sugar
- A generous pinch of salt
- 5 large egg yolks
- 1 whole vanilla bean pod, 1 Tbsp. vanilla bean paste,
Instructions
Begin by preparing your ice cream maker (set the bowl in the freezer, or get enough ice and rock salt on hand, etc.). Set a mesh sieve over a medium sized mixing bowl.
Separated 5 eggs and place the yolks into a small mixing bowl. Whisk them with 1/2 cup (4 oz.) of whole milk until smooth.
Place remaining 1/2 cup (4 oz.) of whole milk and 2 cups (16 oz.) of whipping cream in a sauce pan with the 3/4 cup (150 g) sugar and the pinch of salt. Heat over medium low heat, stirring occasionally, until the mixture is steaming and hot. Slowly ladle or drizzle about half of the steaming milk and cream mixture into the egg yolks while whisking vigourously. This tempers the egg yolks and warms them gently, which prevents them from cooking too quickly.
Pour the entire mixture back into the sauce pan. Cook it over medium low heat, stirring constantly, until the mixture has cooked and thickened enough to coat the back of a spoon without running off. It should be around 194°F (90°C) when it’s done.
When it’s finished cooking, pour the custard through the sieve into the bowl. Whisk in the insides scraped from a vanilla bean or 1 Tbsp. of vanilla bean paste. If using the vanilla bean, you can add it to the custard while it cools for even more flavor.
Place a sheet of plastic wrap on top of the custard in the bowl. This prevents a tough skin from forming on top of the custard as it cools. Chill it in the refrigerator until it has completely cooled, at least 6 hours or up to 24.
When the custard is chilled, churn it according to your ice cream maker’s instructions. If you added the vanilla bean pod, remove it before churning.
After churning, the ice cream will be a soft serve consistency. If you wish for a harder texture, immediately transfer it to a freezer safe container and freeze until the ice cream is frozen solid. This should take about 6-7 hours, but can vary depending on where you store your ice cream in the freezer, and if you are using a deep freeze or not.
Notes
- Making ice cream can look like a time consuming process, but your actual hands on time is actually pretty short! Make sure to plan ahead and have everything ready based on the type of ice cream maker you own. Freeze the bowl, or be sure to have lots of ice and rock salt on hand, etc.
- Ice cream is actually a great make ahead dessert! It’ll keep in a covered container in the freezer for up to 2 weeks. If you see ice crystals on the ice cream, you can scrape a small layer off and the ice cream underneath will be just fine.
- You may still end up with tiny bits of cooked egg yolk in your custard. That’s what the sieve is for, so be sure to not skip that step to insure smooth ice cream.
- Prep Time: 30 minutes
- Category: Dessert
- Method: Churning and Freezing
- Cuisine: Traditional
