Ingredients
- 1 1/2 cups whole milk
- 1/2 cup heavy whipping cream
- 1/3-1/2 cup (66-100 grams) granulated sugar
- 3 tablespoons (28 grams) cornstarch
- 2 Tablespoons (12 grams) regular or dark cocoa powder, not Dutch process
- 1/4 teaspoon salt
- 3 egg yolks
- 1 whole egg
- 2 tablespoons (14 grams) butter
- 4 oz. (1/2 cup) chopped dark chocolate
- 1 teaspoon vanilla extract or vanilla bean paste
Instructions
Preparing to Cook the Chocolate Cream Filling
Pour the cream and milk into a medium saucepan. Chop the chocolate into small pieces and the butter into cubes. Place a fine mesh sieve over a mixing bowl to strain the pastry cream through.
Making the Filling
In a small mixing bowl, mix the egg yolks, sugar, cocoa powder, cornstarch, and salt until they are a smooth paste. If the mixture is too thick, add a few tablespoons of the milk mixture until it’s a stirrable consistency.
Heat the milk and cream until they are steaming but not boiling. Slowly ladle the hot milk into the bowl with the egg yolks while stirring. This brings up the temperature of the eggs without them cooking too quickly, and is a process called tempering.
Once you’ve added about 1/3 to 1/2 of the milk, pour all of the mixture back into the saucepan. Place the pan on a burner over medium-low heat and cook it, stirring constantly so that the mixture doesn’t curdle or scorch. If you feel like it’s cooking too quickly, turn the heat down.
Continue to stir and whisk the pastry cream until it begins to bubble. At that point, continue stirring vigorously while cooking for one more minute.
Remove the pastry cream from the heat and immediately pour it through the fine mesh sieve to remove any lump or bits of cooked eggs.
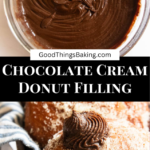
Immediately add the chopped chocolate, butter, and vanilla bean paste or extract. Stir until they are all melted and completely mixed in. The filling should be perfectly creamy and velvety smooth.
Place a sheet of plastic wrap directly onto the pastry cream and refrigerate it until it’s completely cooled. At this point, it’s ready to use in your donuts and will keep in the refrigerator for up to 3-4 days.
Filling the Donuts
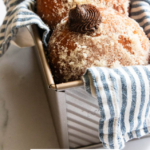
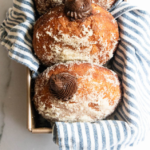
Once the chocolate cream filling has cooled, you can fill your donuts. Fry the donuts, and immediately dip them in the sugar. If you are going to glaze them, allow the donuts to cool before glazing, then fill them.
Once the donuts have cooled completely, they are ready for the chocolate filling. Using a thin knife or a skewer, poke a hole in the side of each donut. Move it around back and forth a little bit so there’s a pocket inside without creating a very large opening.
Cut the tip off of a pastry bag and insert a round or star pastry tip. Fold back the top of a bag and use a large spoon to fill the bag with the chocolate filling. You can also place the bag in a glass to hold it while you fill it.
Note: If you don’t have pastry bags or tips, you can also use a zippered bag and cut a corner off it. It will be messier and harder to control, but can definitely work!
Place the tip of the bag into the hole on the side of each donut. Squeeze in filling until you feel the donut growing heavy in your hand and start to feel some resistance. Then remove the bag and repeat until all of the donuts are filled.
Refrigerate the donuts until you’re serving them. If they are completely chilled, set them out for about 30 minutes to come to room temperature before eating.
Notes
- This is my favorite donut recipe. The donuts turn out amazingly soft and tender but are sturdy enough to hold up to a filling like this one.
- If you want to dip the donuts in sugar, be sure to do so immediately after removing them from the frying pan. Both the heat and the oil on the outside help the sugar stick to them really well.
- Prep Time: 10 minutes
- Cook Time: 15 minutes


